오늘은 깡샘의 안드로이드 프로그래밍에 나오는 Part2 도전과제를 풀어보도록 할게요!
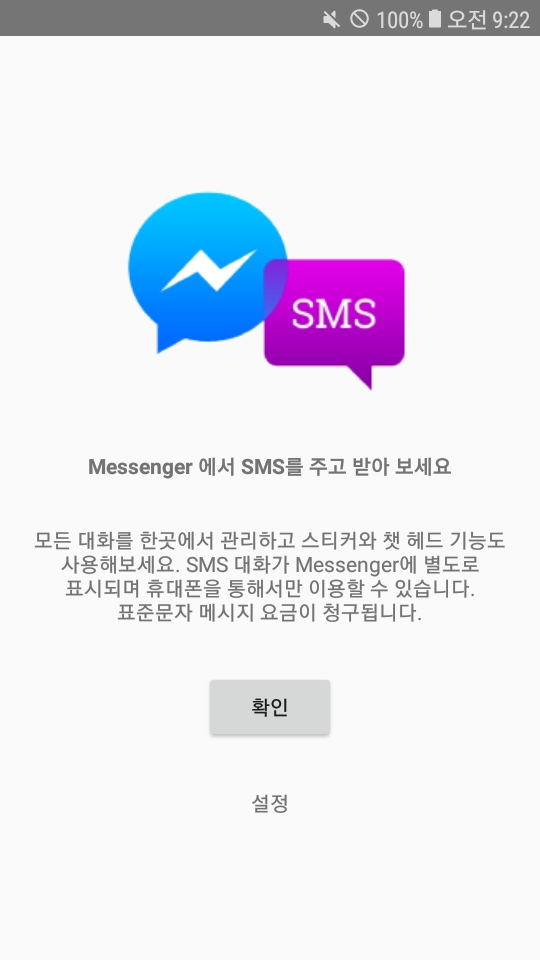
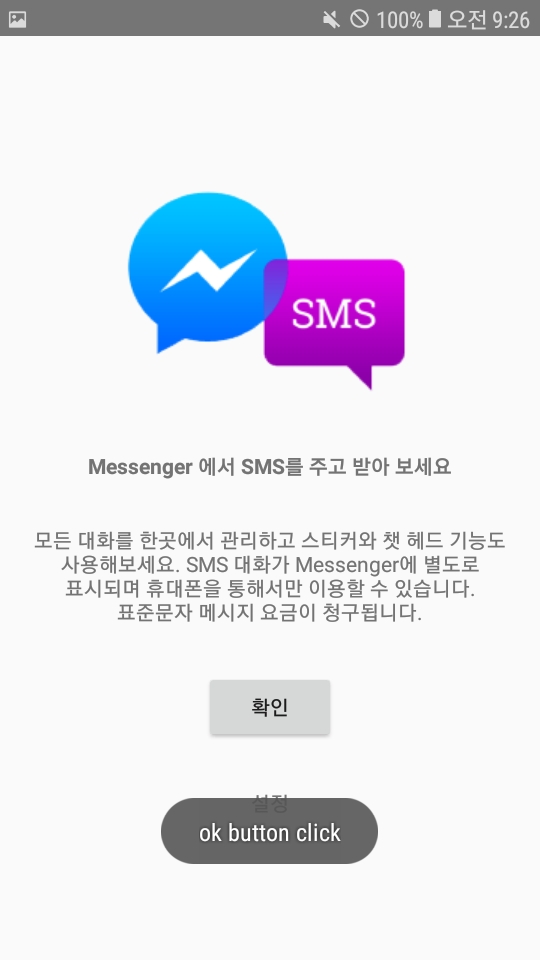
Mission1. 페이스북의 메신저 인트로 화면 구현하기
요구사항: 레이아웃 XML 파일을 이용하여 작성하며, 이미지, 타이틀 문자열, 콘텐츠 문자열, 버튼, 설정 문자열을 출력한다. 그리고 버튼을 클릭하면 "ok button click"이라는 문자열을 토스트(Toast)로 출력한다.
<?xml version="1.0" encoding="utf-8"?>
<LinearLayout xmlns:android="http://schemas.android.com/apk/res/android"
    android:layout_width="match_parent"
    android:layout_height="match_parent"
    android:orientation="vertical"
    android:gravity="center"
    android:layout_margin="20dp">

    <TextView
        android:layout_width="wrap_content"
        android:layout_height="wrap_content"
        android:textStyle="bold"
        android:layout_marginTop="30dp"
        android:layout_marginBottom="30dp"
        android:text="@string/title"/>
    <TextView
        android:layout_width="wrap_content"
        android:layout_height="wrap_content"
        android:text="@string/content"/>
    <Button
        android:id="@+id/but"
        android:layout_width="wrap_content"
        android:layout_height="wrap_content"
        android:layout_marginTop="30dp"
        android:layout_marginBottom="30dp"
        android:text="@string/button"/>
    <TextView
        android:layout_width="wrap_content"
        android:layout_height="wrap_content"
        android:text="@string/setting"/>

</LinearLayout>
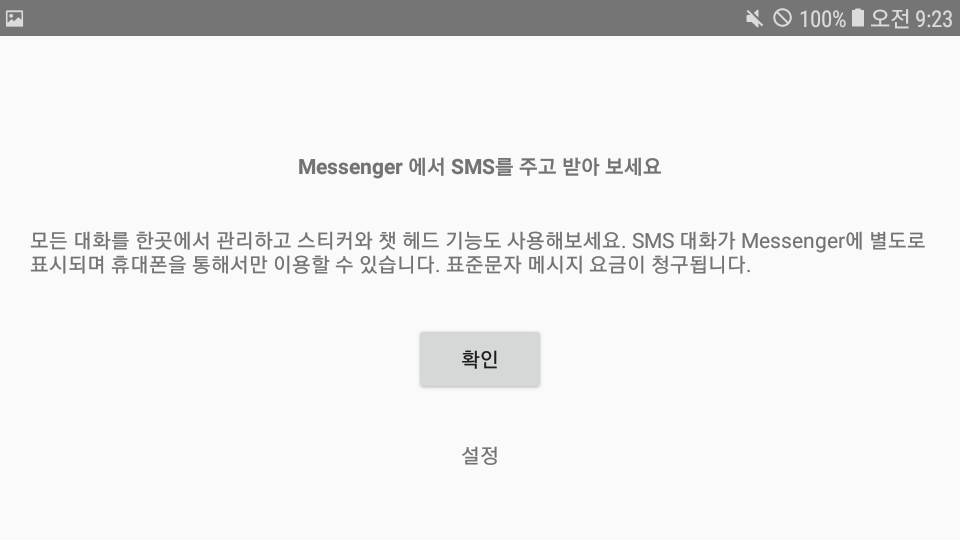
가로모드와 세로모드 변환 방법은
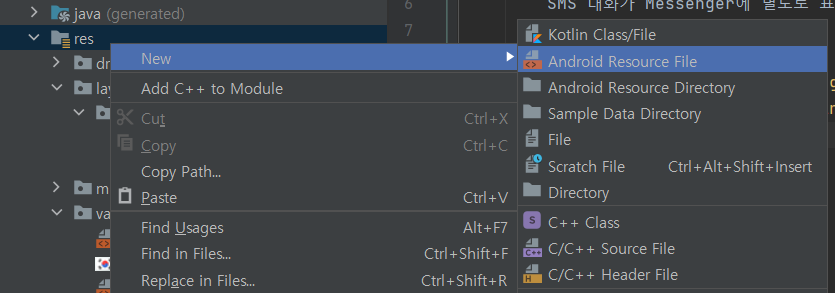
res 폴더에서 우클릭 후 Android Resource File로 들어가서
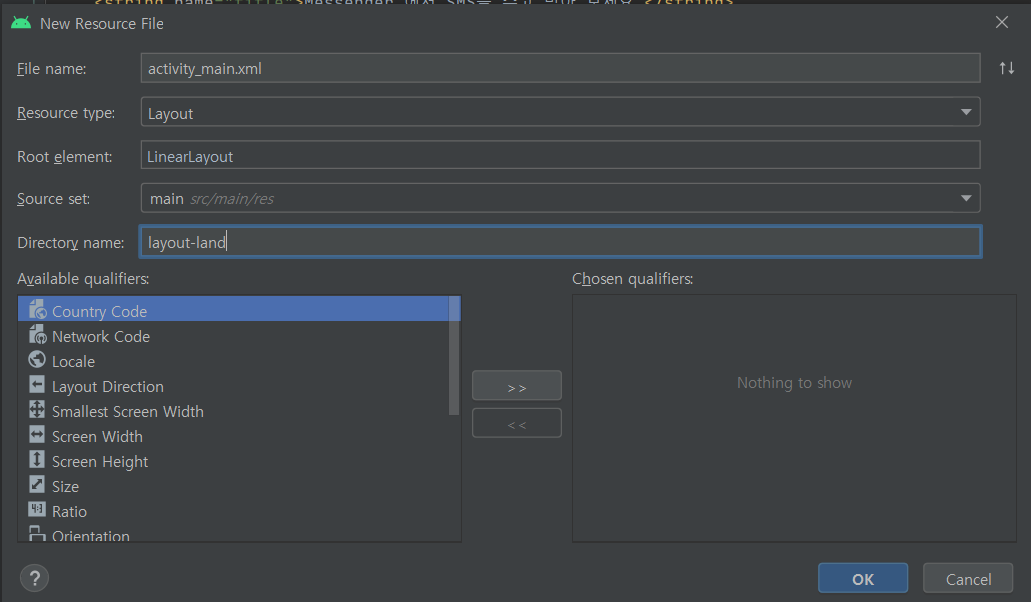
설정을 입력해주고 확인을 누르면
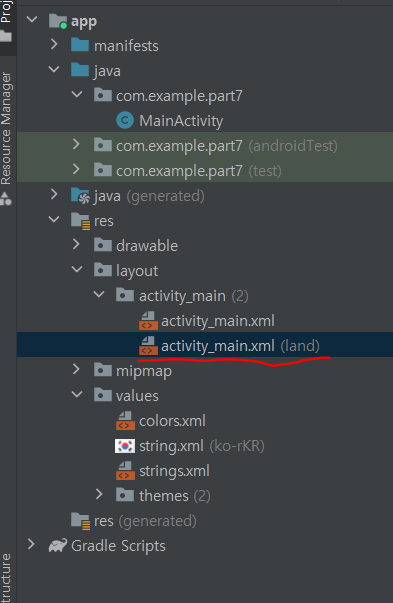
사진처럼 세로모드 xml이 만들어 져요!!
(가로모드 XML)
<?xml version="1.0" encoding="utf-8"?>
<LinearLayout xmlns:android="http://schemas.android.com/apk/res/android"
    android:layout_width="match_parent"
    android:layout_height="match_parent"
    android:orientation="vertical"
    android:gravity="center"
    android:layout_margin="20dp"
    >

    <ImageView
        android:layout_width="wrap_content"
        android:layout_height="wrap_content"
        android:src="@drawable/icon"/>
    <TextView
        android:layout_width="wrap_content"
        android:layout_height="wrap_content"
        android:textStyle="bold"
        android:layout_marginTop="30dp"
        android:layout_marginBottom="30dp"
        android:text="@string/title"/>
    <TextView
        android:layout_width="wrap_content"
        android:layout_height="wrap_content"
        android:gravity="center"
        android:text="@string/content"/>
    <Button
        android:id="@+id/but"
        android:layout_width="wrap_content"
        android:layout_height="wrap_content"
        android:layout_marginTop="30dp"
        android:layout_marginBottom="30dp"
        android:text="@string/button"/>

    <TextView
        android:layout_width="wrap_content"
        android:layout_height="wrap_content"
        android:text="@string/setting"/>

</LinearLayout>
(세로모드 XML)
<?xml version="1.0" encoding="utf-8"?>
<LinearLayout xmlns:android="http://schemas.android.com/apk/res/android"
android:layout_width="match_parent"
android:layout_height="match_parent"
android:orientation="vertical"
android:gravity="center"
android:layout_margin="20dp">
<TextView
android:layout_width="wrap_content"
android:layout_height="wrap_content"
android:textStyle="bold"
android:layout_marginTop="30dp"
android:layout_marginBottom="30dp"
android:text="@string/title"/>
<TextView
android:layout_width="wrap_content"
android:layout_height="wrap_content"
android:text="@string/content"/>
<Button
android:id="@+id/but"
android:layout_width="wrap_content"
android:layout_height="wrap_content"
android:layout_marginTop="30dp"
android:layout_marginBottom="30dp"
android:text="@string/button"/>
<TextView
android:layout_width="wrap_content"
android:layout_height="wrap_content"
android:text="@string/setting"/>
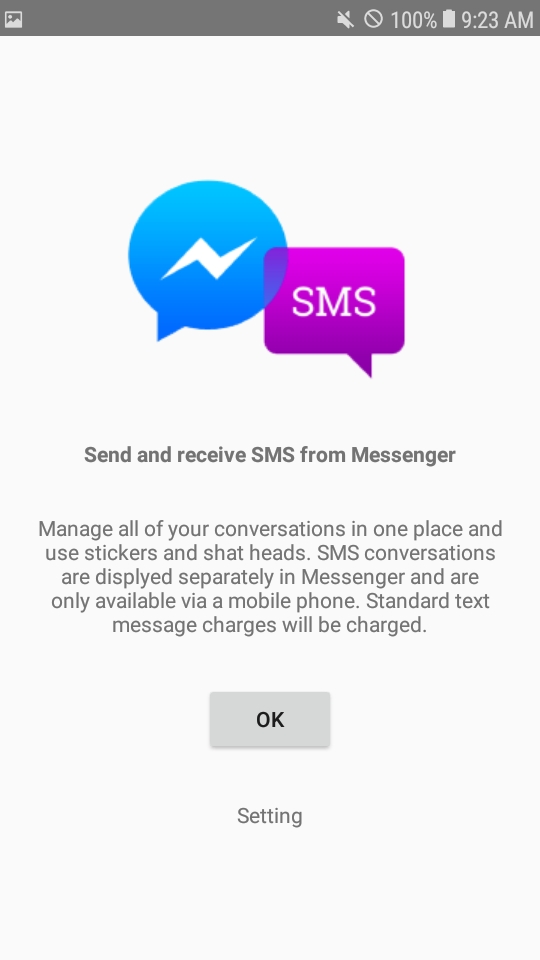
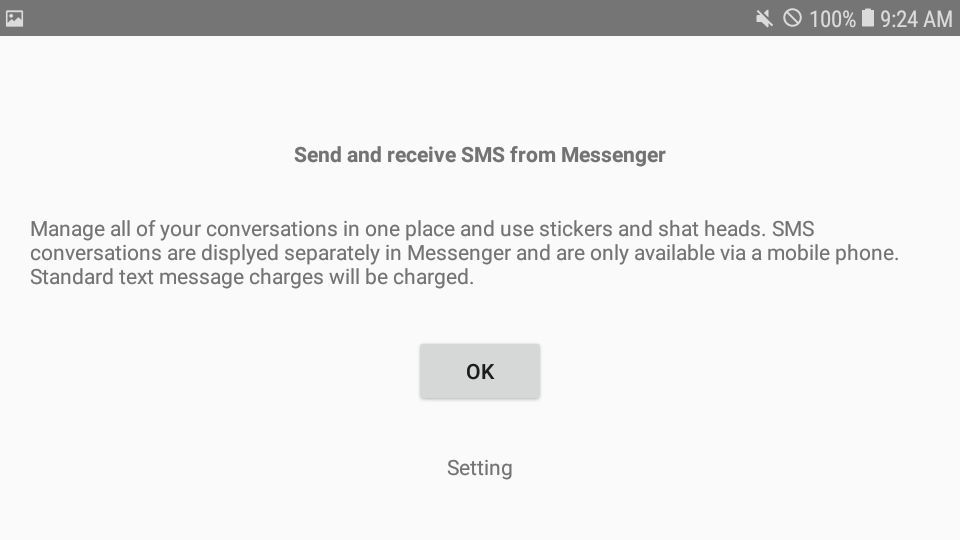
</LinearLayout>한국어 버전과 영어버전 설정 방법은
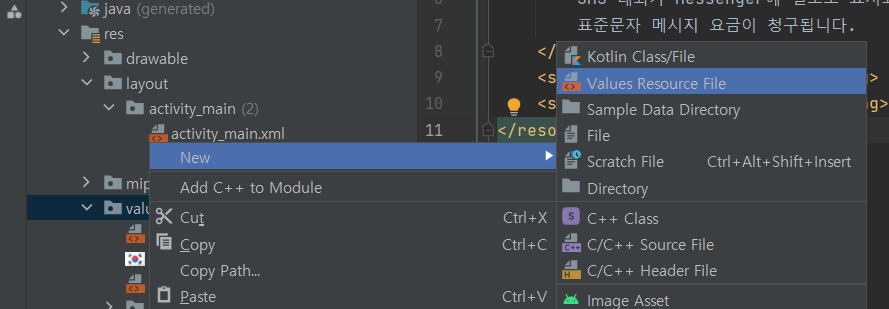
values 우측 클릭 후 Values Resource File을 클릭 해 줍니다! 그리고 사진처럼 설정 해주시면 돼요!
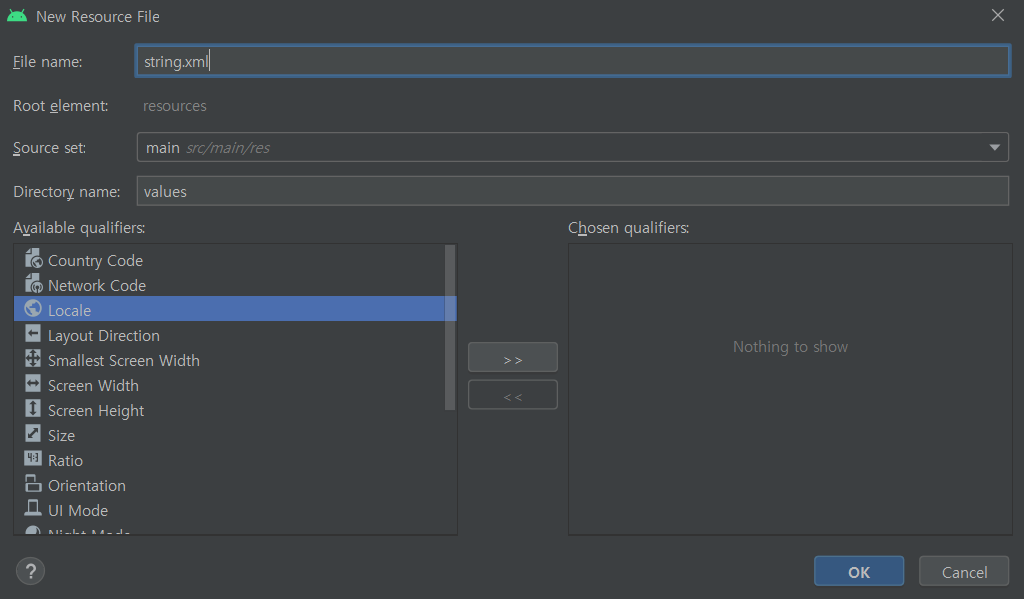
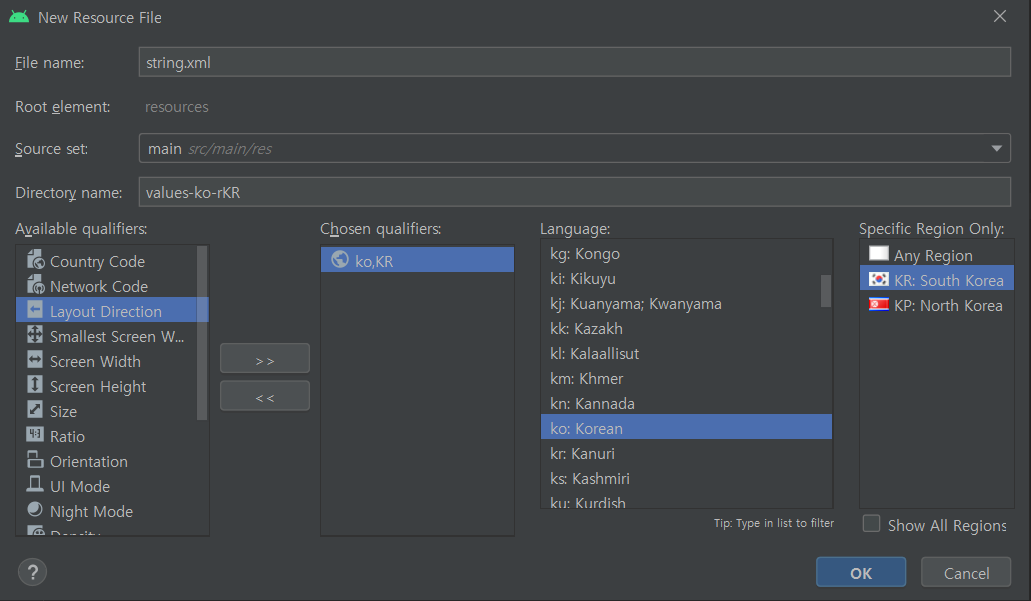
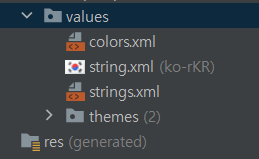
이렇게 설정을 하면 한국어 버전 string.xml과 영어버전 string.xml이 만들어 져요 ~
(한국어 버전 XML)
<?xml version="1.0" encoding="utf-8"?>
<resources>
    <string name="title">Messenger 에서 SMS를 주고 받아 보세요 </string>
    <string name="content">
       모든 대화를 한곳에서 관리하고 스티커와 챗 헤드 기능도 사용해보세요.
        SMS 대화가 Messenger에 별도로 표시되며 휴대폰을 통해서만 이용할 수 있습니다.
        표준문자 메시지 요금이 청구됩니다.
    </string>
    <string name="button">확인</string>
    <string name="setting">설정</string>
</resources>
(영어 버전 XML)
<?xml version="1.0" encoding="utf-8"?>
<resources>
    <string name="title">Send and receive SMS from Messenger </string>
    <string name="content">
        Manage all of your conversations in one place and use
        stickers and shat heads. SMS conversations are
        displyed separately in Messenger and are only
        available via a mobile phone. Standard text message
        charges will be charged.
    </string>
    <string name="button">ok </string>
    <string name="setting">Setting</string>
</resources>
string.xml을 만들고 설정이 잘 됐는지 확인해보려고 하는데 갑자기 오류가 났네요!
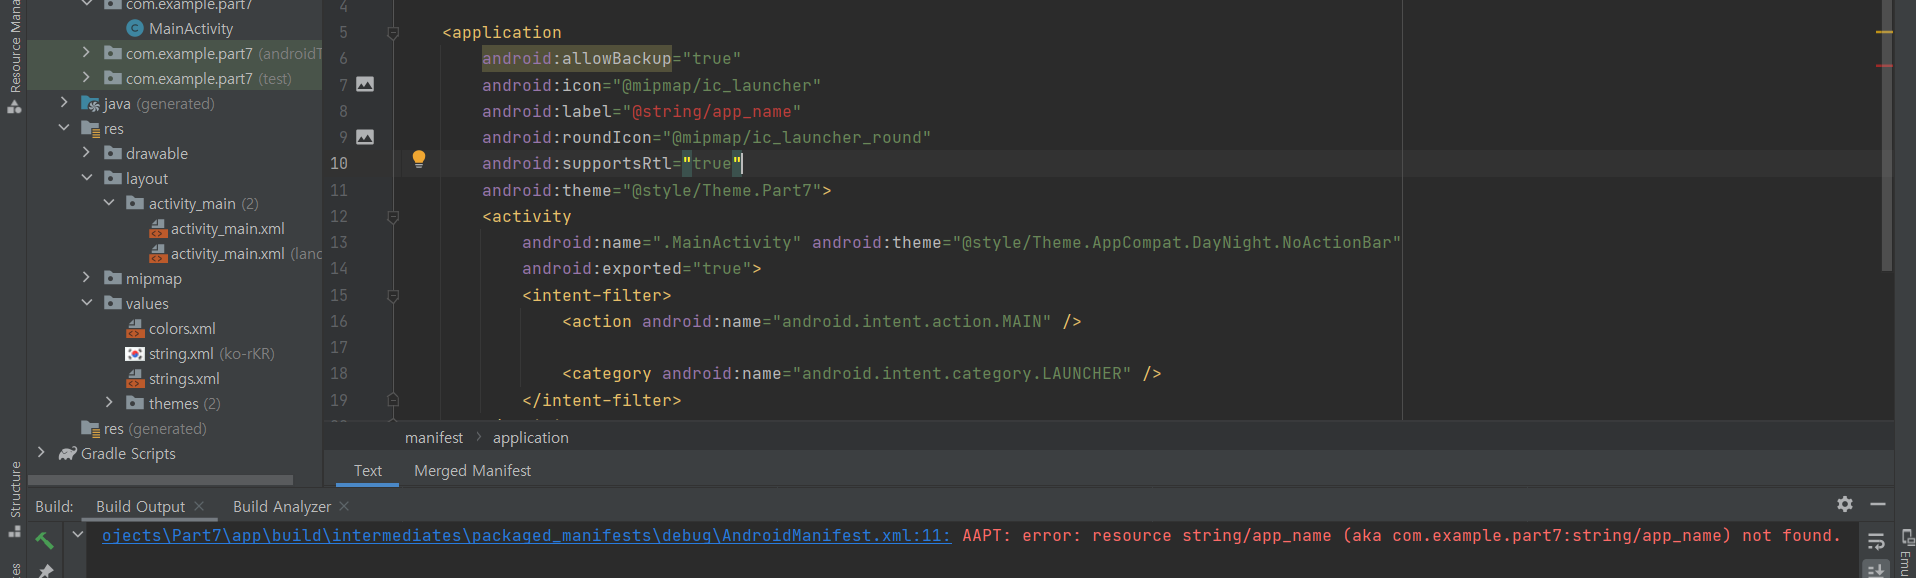
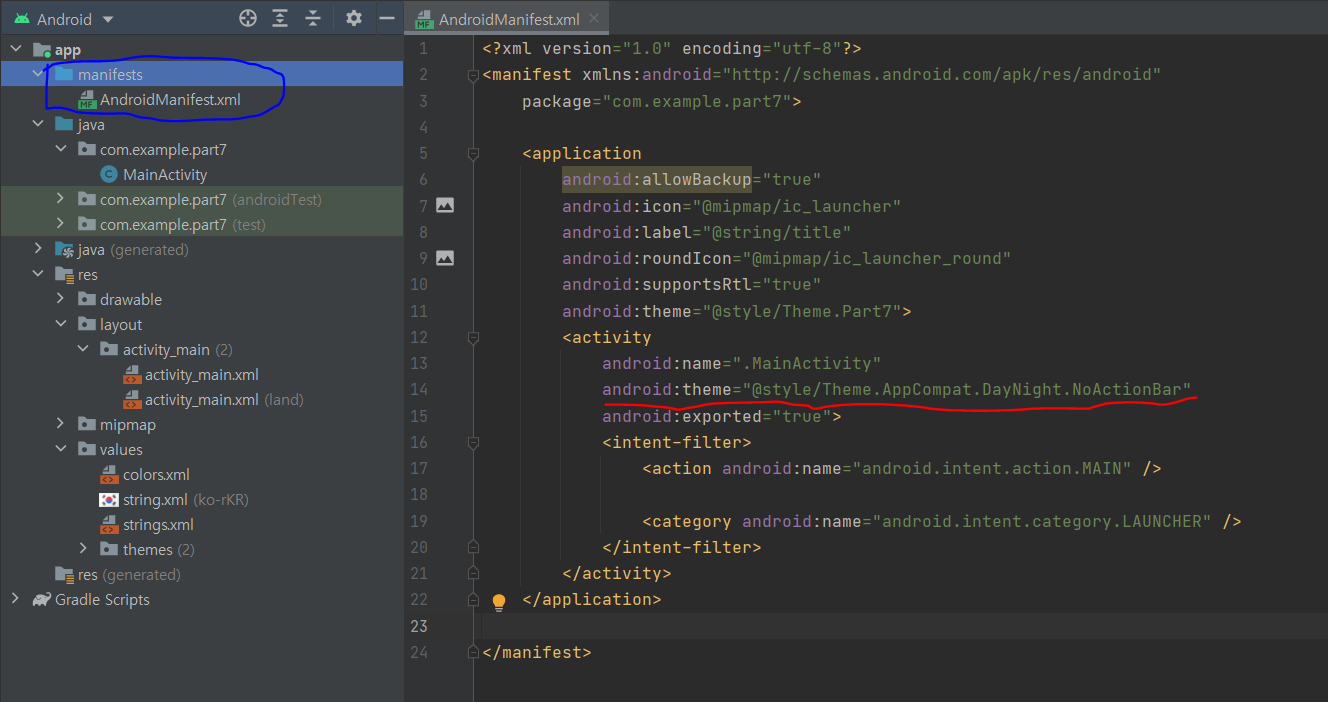
확인을 해보니 manifest에서 기본 설정으로 되어있던 label을 제가 바꿔서 app_name이라는 res가 없어!! 이런 의미인데 여기서 label 이란 무엇이냐면요 앱의 이름을 지정해 주는 것이에요 만약 app_name을 title로 바꾸게 되면
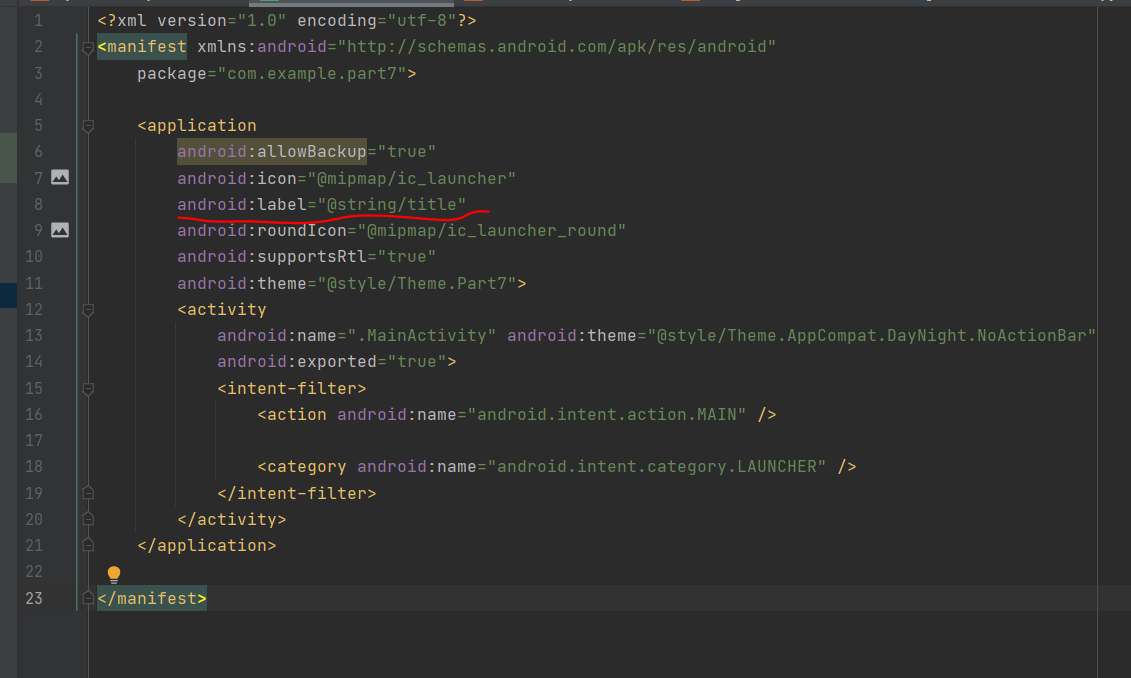
앱의 이름이 제가 작성한 title로 바뀌게 됩니다! (액션바 또한 이름이 변경 돼요!)
이제 확인 버튼 클릭시 ok button click 토스트를 구현 해보도록 할게요 ~
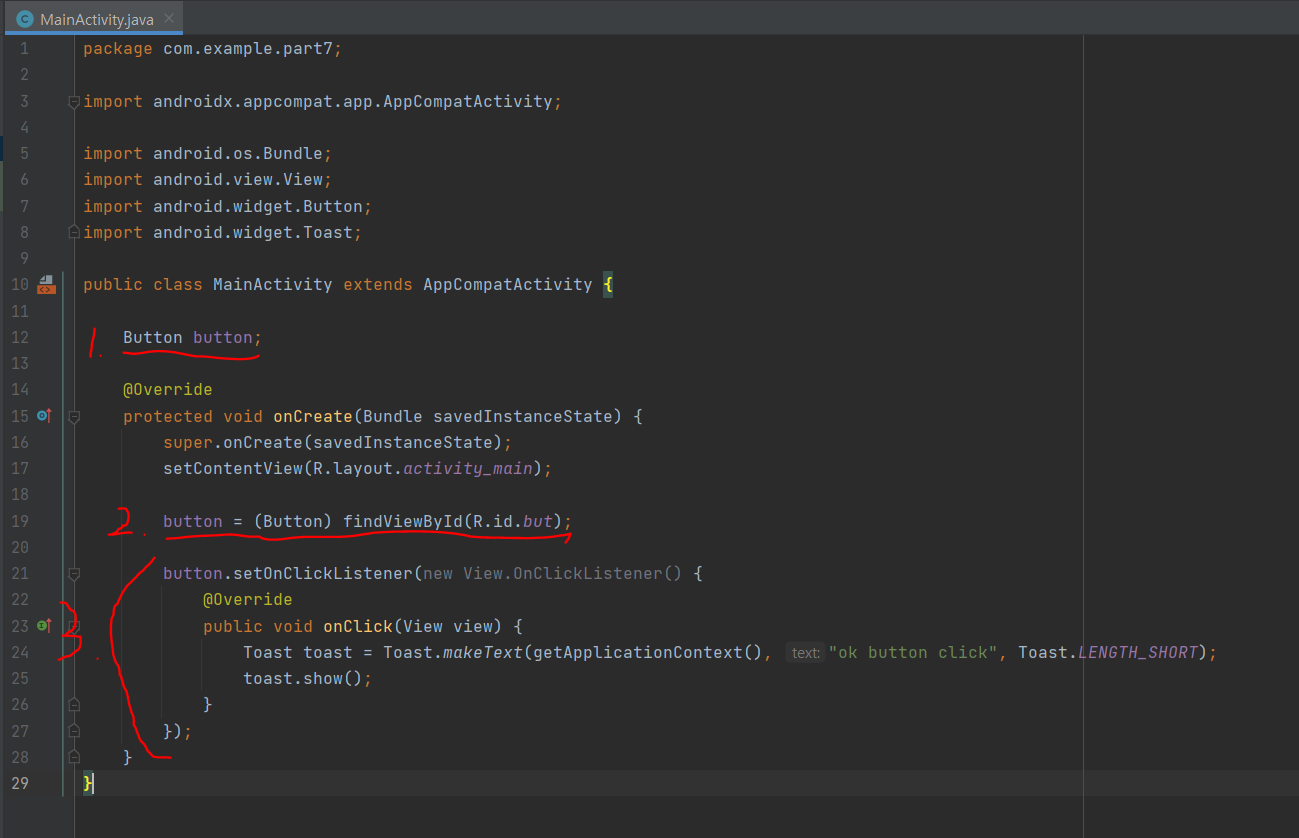
1. 버튼 객체를 생성해 주고
2. 버튼을 객체화 시켜준다.
3. onclickListener로 버튼 클릭 시 Toast 가 실행되게 만들어준다.
마지막으로 상단의 액션바를 없애는 방법은 왼쪽 탭에서 mainfests -> Androidmainfests.xml 에 들어가서 사진에 나와있는 빨간 밑줄 부분을 작성하면 됩니다!
Mission2. 브런치 앱의 새 글 작성 화면 및 앱 종료 다이얼로그 띄우기
요구사항:
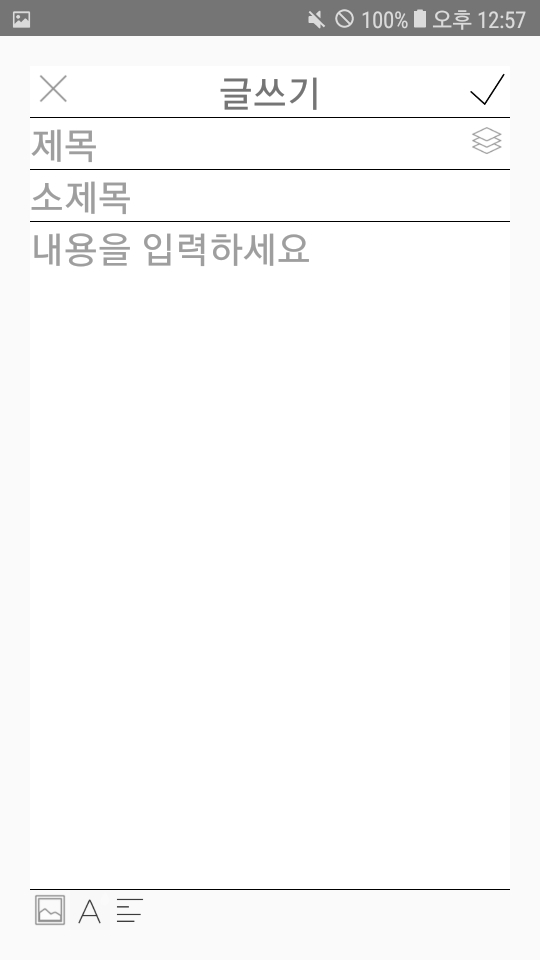
1. 레이아웃 XML 파일을 이용하여 작성하며 상단에 닫기(close)아이콘, 체크(check)아이콘을 제공하고, 하단에 이미지 3개를 제공한다. 중간에는 제목, 소제목, 내용을 입력받기 위한 화면을 제공한다.
2. 화면 하단에 3개의 버튼 구성
3. 제목과 소제목은 한 줄 입력만 허용하며, 내용은 여러 줄 입력이 가능하게 제공한다.
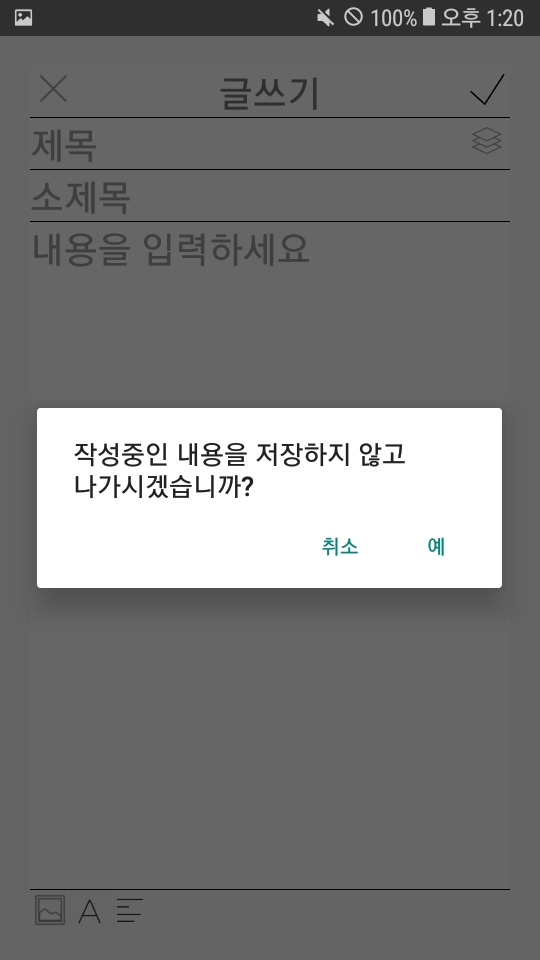
4. 뒤로가기 버튼을 누르면 확인 다이얼로그를 띄우며, 취소를 누르면 다이얼로그만 닫고 확인을 누르면 액티비티를 벗어나게 처리한다.
미션 중에 키보드가 올라오면 가장 하단의 이미지 뷰 세 개가 같이 가려지지 않게 구현을 해야 하는데 이 부분은 어려워서 구현을 못 했네요 ㅠㅠ 다음에 시간이 좀 널널하면 그때 다시 구현해야겠어요 후..
<?xml version="1.0" encoding="utf-8"?>
<LinearLayout xmlns:android="http://schemas.android.com/apk/res/android"
    android:layout_width="match_parent"
    android:layout_height="match_parent"
    android:orientation="vertical"
    android:layout_margin="20dp">

    <!-- top titel  -->
    <RelativeLayout
        android:layout_width="match_parent"
        android:layout_height="wrap_content"
        android:background="@drawable/border"
        >

        <ImageView
            android:layout_width="wrap_content"
            android:layout_height="wrap_content"
            android:maxHeight="30dp"
            android:maxWidth="30dp"
            android:adjustViewBounds="true"
            android:src="@drawable/icon_close"/>

        <TextView
            android:layout_width="wrap_content"
            android:layout_height="wrap_content"
            android:layout_centerHorizontal="true"
            android:textSize="25dp"
            android:text="글쓰기"/>

        <ImageView
            android:layout_width="wrap_content"
            android:layout_height="wrap_content"
            android:layout_alignParentRight="true"
            android:maxHeight="30dp"
            android:maxWidth="30dp"
            android:adjustViewBounds="true"
            android:src="@drawable/icon_ok"/>
    </RelativeLayout>

    <!-- titel  -->
    <RelativeLayout
        android:layout_width="match_parent"
        android:layout_height="wrap_content"
        android:background="@drawable/border">

        <EditText
            android:layout_width="wrap_content"
            android:layout_height="wrap_content"
            android:singleLine="true"
            android:background="@null"
            android:textSize="25dp"
            android:hint="제목"/>

        <ImageView
            android:layout_width="wrap_content"
            android:layout_height="wrap_content"
            android:layout_alignParentRight="true"
            android:maxHeight="30dp"
            android:maxWidth="30dp"
            android:adjustViewBounds="true"
            android:src="@drawable/icon_layer"/>
    </RelativeLayout>

    <!-- subtitel  -->
    <RelativeLayout
        android:layout_width="match_parent"
        android:layout_height="wrap_content"
        android:background="@drawable/border">

        <EditText
            android:layout_width="wrap_content"
            android:layout_height="wrap_content"
            android:singleLine="true"
            android:background="@null"
            android:textSize="25dp"
            android:hint="소제목"/>

    </RelativeLayout>

    <!-- content  -->
    <RelativeLayout
        android:layout_width="match_parent"
        android:layout_height="wrap_content"
        android:background="@drawable/border">

        <EditText
            android:layout_width="wrap_content"
            android:layout_height="wrap_content"
            android:maxLines="30"
            android:background="@null"
            android:minLines="15"
            android:gravity="top"
            android:textSize="25dp"
            android:hint="내용을 입력하세요"/>

    </RelativeLayout>

    <!-- bottom -->
    <LinearLayout
        android:layout_width="match_parent"
        android:layout_height="wrap_content">

        <ImageView
            android:layout_width="wrap_content"
            android:layout_height="wrap_content"
            android:maxHeight="30dp"
            android:maxWidth="30dp"
            android:adjustViewBounds="true"
            android:src="@drawable/icon_photo"/>

        <ImageView
            android:layout_width="wrap_content"
            android:layout_height="wrap_content"
            android:maxHeight="30dp"
            android:maxWidth="30dp"
            android:adjustViewBounds="true"
            android:src="@drawable/icon_color"/>

        <ImageView
            android:layout_width="wrap_content"
            android:layout_height="wrap_content"
            android:maxHeight="30dp"
            android:maxWidth="30dp"
            android:adjustViewBounds="true"
            android:src="@drawable/icon_align"
            />

    </LinearLayout>
</LinearLayout>
XML은 이렇게 작성을 했습니다. 레이아웃을 만드는 과정에서 제가 몰랐던 부분이나 기억이 나지 않아서 찾아보게 된 부분들만 따로 설명으로 적어놓을게요! 혹시 작성되어 있는 부분 외에 이해가 안 가는 부분이 있으면 댓글 남겨주시면 답변드릴게요 ~
ImageView에서 maxHeight="30dp"와 maxWidth="30dp"을 사용한 이유는 스마트폰마다 화면의 크기가 각각 다르기 때문에 모든 스마트폰에 내가 설정한 이미지 크기를 어느 스마트폰이던 최대 30dp만큼만 주기 위해서 maxHeight와 maxWidth를 사용하게 되었습니다 ~ (ImageView가 아니더라도 다른 뷰에서 maxHeight와 maxWidth 사용 가능합니다! )
그리고 android:adjustViewBounds="true"를 사용한 이유는 maxHeight와 maxWidth가 안 먹혀서 찾아본 결과 adjustViewBounds="true" 사용하게 되면 이미지 뷰의 크기를 wrap_content처럼 알아서 조정해 주면서 maxHeight와 maxWidth에 맞춰 주는 거 같아서 저는 사용하게 되었어요!
하지만 실제 의미는 ImageView를 사용할 때 너비는 match_parent나 wrap_content로 하면 맞추는 게 쉽지만, 높이는 그렇게 하면 영역을 너무 크게 차지하여 다른 뷰들이 보이지 않거나 문제가 돼서 사용하지 못해 이런 문제를 해결하기 위해 android:adjustViewBounds="true" 사용하여 ImageView의 너비와 이미지의 원래 비율로 계산을 해서 ImageView의 높이가 결정된다고 해요!
단, 주의할 점은 ImageView에 이미지를 넣을 때 background가 아닌 src로 넣어야 하며, height은 wrap_content 여야 한다고 하네요 ~
EditText에서 android:singleLine="true"를 사용한 이유는 한 줄만 입력할 수 있게 하기 위해서 사용하였고
android:background="@null"을 사용 한 이유는 edittext의 밑줄을 제거하기 위해서 사용했습니다!
그리고 android:hint="내용을 입력하세요"는 사용자가 값을 입력할 경우 가이드 글이 사라지게 하는 기능이며,
android:maxLines="15"는 최대 15줄까지 입력할 수 있게 하기 위해서입니다
android:gravity="top"은 hint에 작성한 내용을 입력하세요를 가장 상단에 올리기 위해서 사용했어요!
그리고 뷰 밑에 검은색으로 밑줄이 그어져 있는 건 https://dinosaur1.tistory.com/29 이 부분을 확인하면 만드실 수 있어요!
package com.example.part2_mission;

import androidx.appcompat.app.AlertDialog;
import androidx.appcompat.app.AppCompatActivity;

import android.content.DialogInterface;
import android.os.Bundle;

public class MainActivity extends AppCompatActivity {

    AlertDialog alertDialog;

    @Override
    protected void onCreate(Bundle savedInstanceState) {
        super.onCreate(savedInstanceState);
        setContentView(R.layout.activity_main);
    }


    @Override
    public void onBackPressed() {   // 뒤로가기 누르면 다이얼로그 생성
        AlertDialog.Builder builder = new AlertDialog.Builder(this);
        builder.setTitle("작성중인 내용을 저장하지 않고 나가시겠습니까?"); // 다이얼로그 제목
        builder.setCancelable(false);   // 다이얼로그 화면 밖 터치 방지
        builder.setPositiveButton("예", new AlertDialog.OnClickListener() {
            public void onClick(DialogInterface dialog, int which) {
                exit();
            }
        });

        builder.setNegativeButton("취소", new AlertDialog.OnClickListener() {
            public void onClick(DialogInterface dialog, int which) {

            }
        });

        builder.show(); // 다이얼로그 보이기
    }

    public void exit() { // 종료
        super.onBackPressed();
    }
}
java코드는 따로 부가설명을 적어 놔서 설명을 할 필요는 없을거 같아요! 혹시라도 궁금한 부분이 있으면 댓글 달아주세요 ~ 답변 해드리겠습니다!
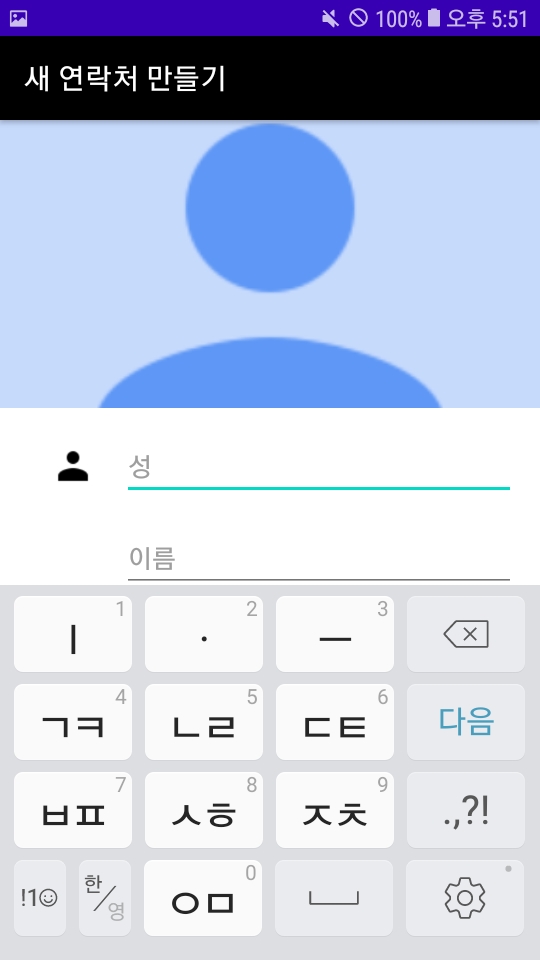
Mission3. 주소록 앱의 새 연락처 화면 구성
요구사항:
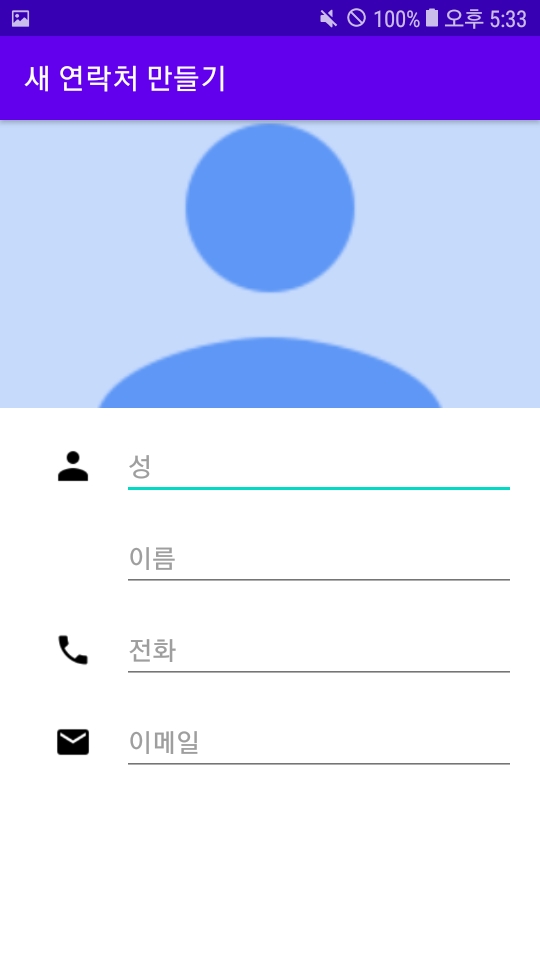
1. 상단의 이미지를 가로 방향 전체를 차지하게 하고 성, 이름, 전화, 이메일을 입력할 수 있는 화면을 제공한다.
4개의 EditText는 세로 방향 정렬이 맞아야 하며, 모두 한 줄 입력만 제공해야 한다. 3개의 아이콘 이미지는 세로 방향으로 정렬되게 출력한다.
2. 입력을 위해 키보드가 올라오면 화면이 일부분 가려지는데, 이때 사용자가 세로 방향 스크롤로 하단의 화면을 볼 수 있게 제공한다.
3. 키보드가 올라오면 기본 문자 입력 모드로 올라오는데, 전화 입력은 전화번호 모드, 이메일 입력은 이메일 모드로 키보드가 올라오게 한다.
미션 3번은 따로 자바코드를 작성하지 않고 레이아웃만 사용해서 만들면 되는 간단한 예제였어요!
<?xml version="1.0" encoding="utf-8"?>
<ScrollView xmlns:android="http://schemas.android.com/apk/res/android"
    android:layout_width="match_parent"
    android:layout_height="match_parent">

    <LinearLayout
        android:layout_width="match_parent"
        android:layout_height="wrap_content"
        android:orientation="vertical">
        <ImageView
            android:layout_width="match_parent"
            android:layout_height="wrap_content"
            android:scaleType="centerCrop"
            android:src="@drawable/icon_person_large"/>

        <LinearLayout
            android:layout_width="match_parent"
            android:layout_height="wrap_content"
            android:orientation="horizontal"
            android:layout_marginLeft="16dp"
            android:layout_marginRight="16dp"
            android:layout_marginTop="16dp">
            <ImageView
                android:layout_width="0dp"
                android:layout_height="wrap_content"
                android:layout_weight="1"
                android:layout_gravity="center"
                android:maxHeight="25dp"
                android:maxWidth="25dp"
                android:adjustViewBounds="true"
                android:src="@drawable/icon_person_small"/>
            <EditText
                android:layout_width="0dp"
                android:layout_height="wrap_content"
                android:layout_weight="4"
                android:inputType="text"
                android:hint="성"/>
        </LinearLayout>

        <LinearLayout
            android:layout_width="match_parent"
            android:layout_height="wrap_content"
            android:orientation="horizontal"
            android:layout_marginLeft="16dp"
            android:layout_marginRight="16dp"
            android:layout_marginTop="16dp">

            <View
                android:layout_width="0dp"
                android:layout_height="0dp"
                android:layout_weight="1"/>
            <EditText
                android:layout_width="0dp"
                android:layout_height="wrap_content"
                android:layout_weight="4"
                android:inputType="text"
                android:hint="이름"/>
        </LinearLayout>

        <LinearLayout
            android:layout_width="match_parent"
            android:layout_height="wrap_content"
            android:orientation="horizontal"
            android:layout_marginLeft="16dp"
            android:layout_marginRight="16dp"
            android:layout_marginTop="16dp">
            <ImageView
                android:layout_width="0dp"
                android:layout_height="wrap_content"
                android:layout_weight="1"
                android:layout_gravity="center"
                android:maxHeight="25dp"
                android:maxWidth="25dp"
                android:adjustViewBounds="true"
                android:src="@drawable/icon_phone"/>
            <EditText
                android:layout_width="0dp"
                android:layout_height="wrap_content"
                android:layout_weight="4"
                android:inputType="text"
                android:hint="전화"/>
        </LinearLayout>

        <LinearLayout
            android:layout_width="match_parent"
            android:layout_height="wrap_content"
            android:orientation="horizontal"
            android:layout_marginLeft="16dp"
            android:layout_marginRight="16dp"
            android:layout_marginTop="16dp">
            <ImageView
                android:layout_width="0dp"
                android:layout_height="wrap_content"
                android:layout_weight="1"
                android:layout_gravity="center"
                android:maxHeight="25dp"
                android:maxWidth="25dp"
                android:adjustViewBounds="true"
                android:src="@drawable/icon_email"/>
            <EditText
                android:layout_width="0dp"
                android:layout_height="wrap_content"
                android:layout_weight="4"
                android:inputType="text"
                android:hint="이메일"/>
        </LinearLayout>

    </LinearLayout>
</ScrollView>
ImageView에서 android:scaleType="centerCrop" 를 사용한 이유는 ImageView의 layout_width, layout_height가 이미지 원본 크기보다 크면 이미지를 확장해서 ImageView의 전체를 차지하게 하는 경우에 scaleType 속성을 이용한다고 해서 사용했어요 ~
그리고 액션바를 바꾸는 방법은
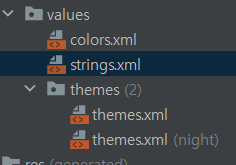
res -> values -> strings.xml에 들어가서

app_name 부분만 바꿔주면 돼요! 그런데 색은 어떤 색으로 해야 맞는지 몰라서 바꾸지 않았는데 바꾸는 방법은
res -> themes -> themes.xml (night버전에서 바꾸지 말고 night가 없는 버전에서 바꿔주세용)
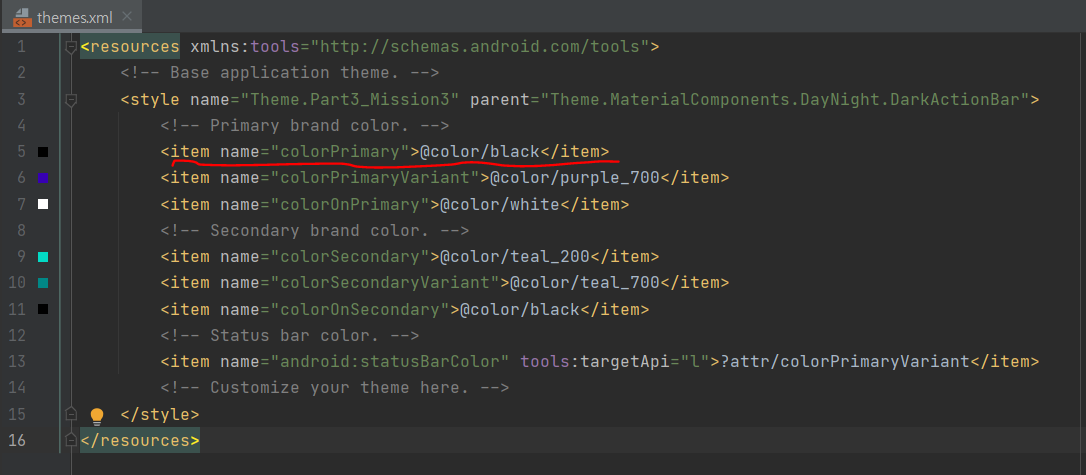
빨간색 밑줄 그은 부분에 색을 바꾸면 액션 바의 색상이 바뀌게 돼요!
그리고 원하시는 색으로 바꾸고 싶으시면 먼저 res -> values -> colors.xml에 들어가셔서 원하는 컬러를 등록하고 가져와야 바꿀 수 있어요!
TIP: 이전 버전에는 res > values > themes 폴더 하위에 styles.xml 파일이 있었다는데 지금 버전은 업데이트로 인해서 styles.xml 파일 대신에 themes.xml 파일로 바뀌었다고 해요 ~
마지막으로 화면에 스크롤 만드는 방법은 ScrollView로 전체를 감싸면 돼요!
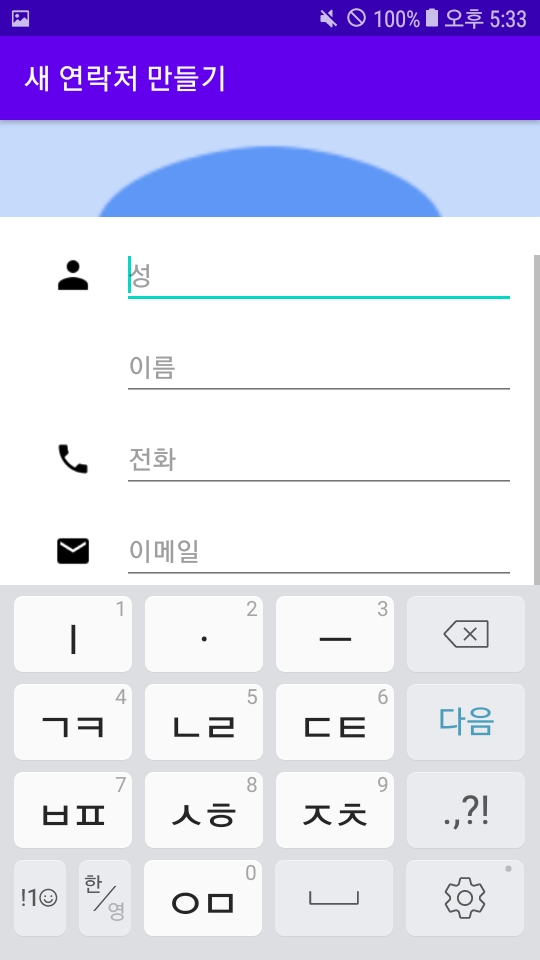
그럼 위 처럼 스크롤이 생기게 됩니다 ~~
'프로그래밍 > 프로젝트' 카테고리의 다른 글
| 유데미 강의 React 완벽 가이드의 두 번째 프로젝트 (0) | 2023.04.24 |
|---|---|
| 유데미 강의 React 완벽 가이드의 첫 번째 프로젝트 (0) | 2023.04.24 |
| 안드로이드 프로젝트(1) UI 구현 (0) | 2022.02.17 |
| 자바 지뢰찾기(Minesweeper) (0) | 2022.02.09 |
| 안드로이드 UI 연습 (버튼 클릭 시 이미지 이동, SMS 입력 화면 만들기, 고객정보 입력 화면 만들기) (0) | 2022.01.20 |