오늘은 node-express-ts 환경설정을 해보도록 하겠습니다!
터미널을 열어준 뒤 원하는 디렉토리에 파일을 생성해서 npm init을 해줍니다.
(참고로 맥 터미널 입니다! 윈도우 이신분은 visualcode 터미널에 입력하셔도 돼요!)
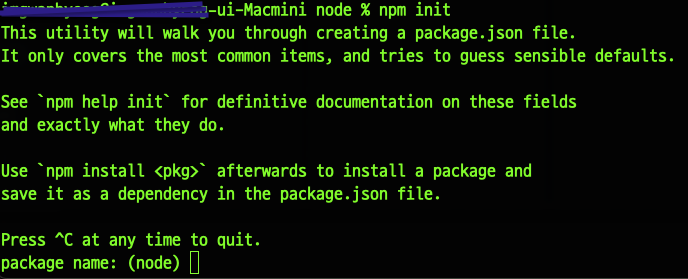
계속 엔터를 쳐주신 뒤 밑에 명령어를 입력해주세요 (vscode 터미널에도 똑같이 입력해주세요)
npm add -D typescript ts-node @types/node @types/express tsc-watch
yarn add -D typescript ts-node @types/node @types/express tsc-watch
설치 완료를 하셨으면 package.json에 가셔서
scripts 안에 "start": "tsc-watch --onSuccess \"ts-node dist/app.js\"", 명령어를 입력해주세요!
"scripts": {
    "start": "tsc-watch --onSuccess \"ts-node dist/app.js\"",
    "test": "echo \"Error: no test specified\" && exit 1"
},[tsc-watch사용하면 ts코드가 바뀔때마다 자동으로 컴파일 해준 뒤 js로 실행시켜줍니다! 그리고 ts-node는 타입스크립트를 실행해 주기 때문에 필요힙니다!]
그 후에 vscode 터미널에 tsc --init 을 입력해서 tsconfig.json 파일을 설치해주세용 ~
그리고 tsconfig.json 파일에 세부내역을 아래처럼 설정 해주세요
{
"compilerOptions": {
/* Visit https://aka.ms/tsconfig.json to read more about this file */
...
/* Projects */
...
/* Language and Environment */
"target": "es2016",  // 컴파일 할 버전 설정

/* Modules */
"module": "commonjs", /* Specify what module code is generated. */   //  어떤 모듈 방식으로 컴파일 할지 설정
"outDir": "dist",  // 컴파일 후 js 파일 생성 되는 위치지정
"moduleResolution": "node",  // 모듈 해설 방법 설정하는 곳
 }
}[esModuleInterop 속성이 true로 설정될 경우, ES6 모듈 사양을 준수하여 CommonJS 모듈을 가져올 수 있게 됩니당]
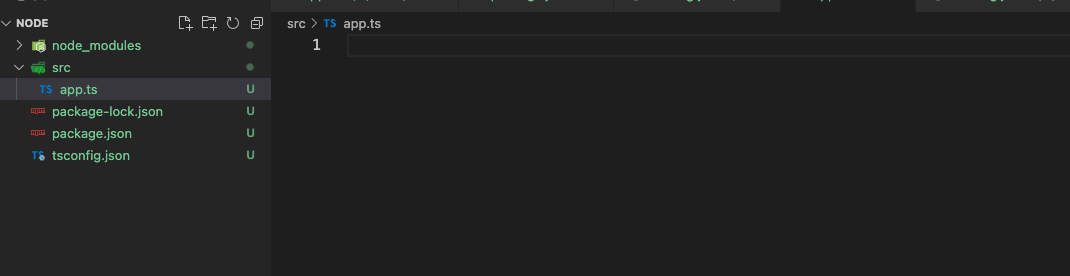
그리고 src 폴더를 만들어 준 뒤 그 안에 app.ts 파일을 만들고 아래 내용을 적어주세요 ~
// app.ts
import express, {Request, Response, NextFunction} from 'express';
const app = express();
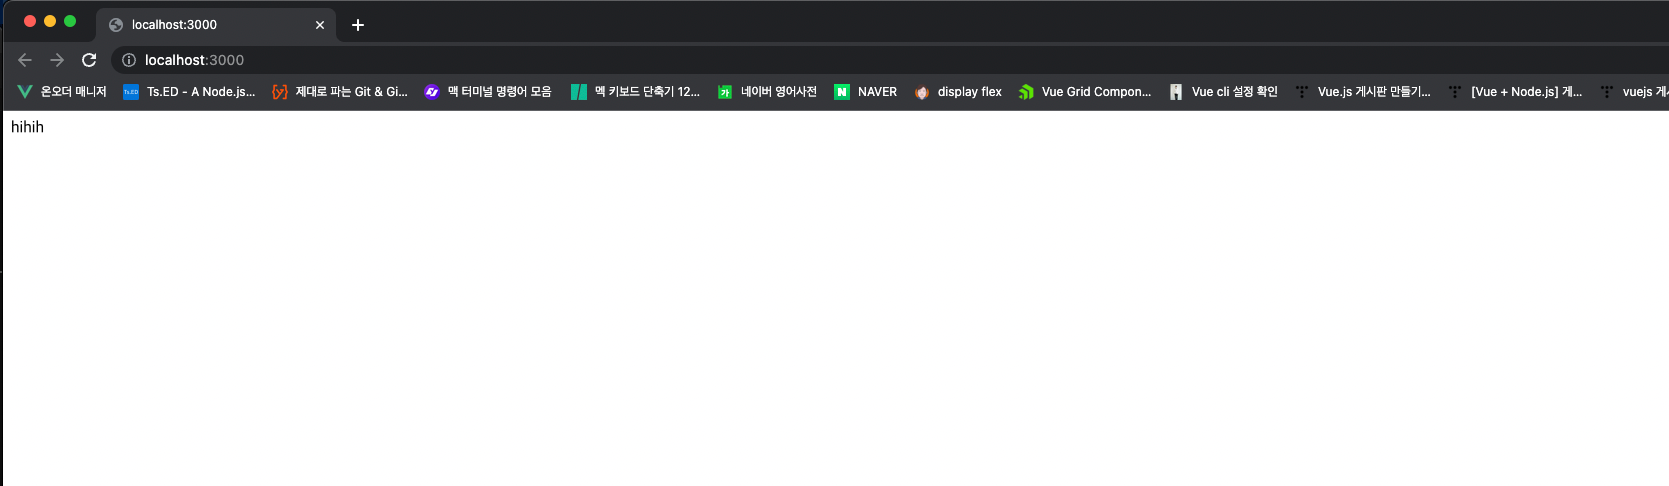
app.get('/', (request:Request, response:Response, next: NextFunction) => {
response.send('hihih');
});
app.listen(3000,()=>{
console.log('start')
})
마지막으로 npm start를 하고 인터넷에 http://localhost:3000/을 작성하면 환경설정 끝이 났습니다!
'프로그래밍 > Node.js' 카테고리의 다른 글
| node-pre-gyp, gyp ERR 해결법 (0) | 2023.03.20 |
|---|